top of page
In-house
Director
Describes the screen configuration when you log in as Director.
In-house

1. New button: Register order for In-house Option.
-
In-house option: A method that Director can design and create himself.
Patient information

First Name, Last Name are required entries.
Classification

This is not a required entry.
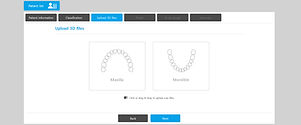
Model type
X-ray image

This is not a required entry.
Photo


Only stl, obj, and fly formats can be uploaded.
This is not a required entry.
Summary
2. Order List: The list of orders registered by Sample Order and Director is displayed, and when you select an order item, you go to the detail screen.
-
Sample Order: There are three orders for each tooth case so that the director can use the program without registering the order.

-
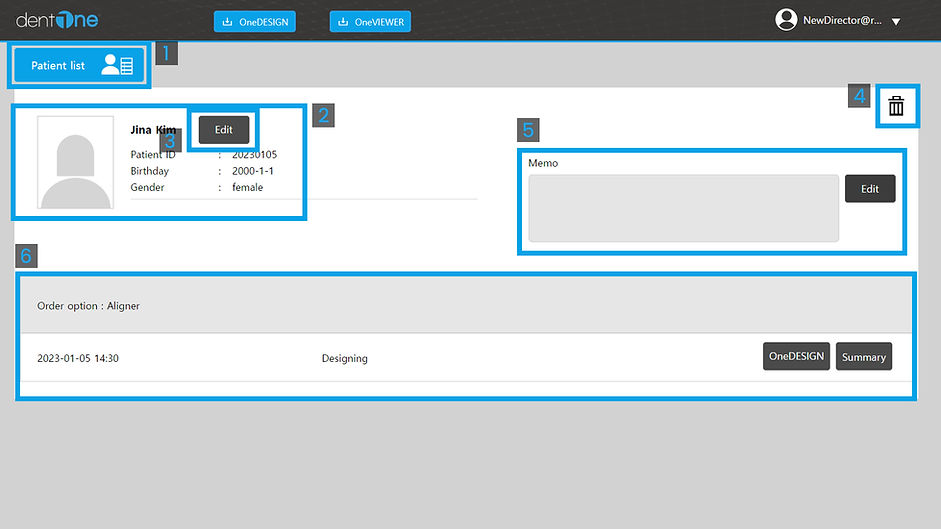
Order Details Screen.
-
Patient list button: Go to the Order List screen.
-
Order information: The order information is displayed, and the Edit button is displayed.
-
Edit button: Displays detailed information about the Order.
[ Patient information ]

4. Trash button : Delete Order.
5. Memo : Create information about the Order.
6. History: Order progress is displayed sequentially, and various buttons are displayed on the right side depending on the situation.
Orders
3. Search : Search Order in the Order List.

-
Search All : Full search button.
-
Search window : Search by entering the input keyword from the patient name and patient id.
-
Calendar: Search Order by date.
[ Calendar Popup ]

-
Period button: Date set 1 month, 2 months, 3 months, 6 months from today.
-
Display Period : Displays the set period and can be edited.
Orders

1. Status option Tap: It is classified into 8 types of tabs according to
Status option.
All
Ordered
Designing


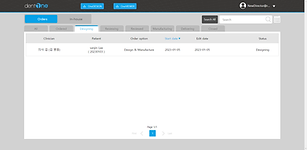
A list of orders received is displayed.
A list of orders under design is displayed.
Reviewing
Reviewed
Manufacturing


The list of orders that the Clinician is
reviewing is displayed.
A list of orders confirmed by Clinician is displayed.
The list of orders that are building
the device is displayed.
Delivering
Closed


You will see a list of orders being shipped.
A list of orders that have completed
the service is displayed.
2. Order List: The list ordered by Clinician is displayed, and when you select
an order item, you go to the Order Details screen.
-
Order Details Screen

-
Patient list button: Go to the Order List screen.
-
Order information: The information of the order is shown, and the information button and the Profile button are shown.
-
Information Button: Order details are displayed.
[ Patient information ]

-
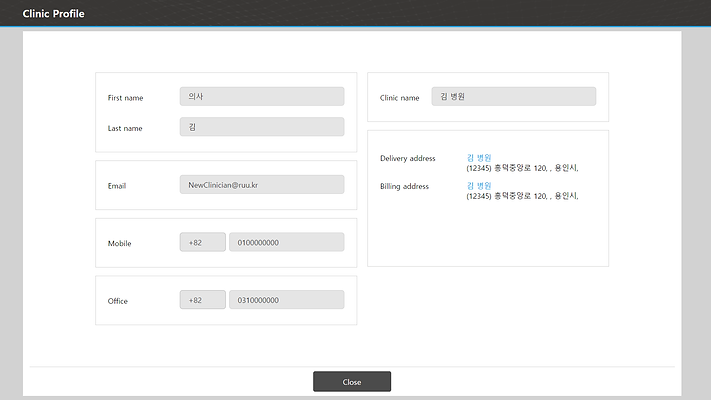
Profile Button: Details of the Clinic are displayed.
[ Clinic Profile ]
4. Memo : Create information about the Order.
5. Comment: You can contact clinician by entering comments and managing records.
6. History: Order progress is displayed sequentially, and various buttons are displayed on the right side depending on the situation.
Menu
3. Search : Search Order in the Order List.

-
Search All : Full search button.
-
Search window : Search by entering the input keyword from the patient name and patient id.
-
Calendar: Search Order by date.
[ Calendar Popup ]
-
Period button: Date set 1 month, 2 months, 3 months, 6 months from today.
-
Display Period : Displays the set period and can be edited.
Menu
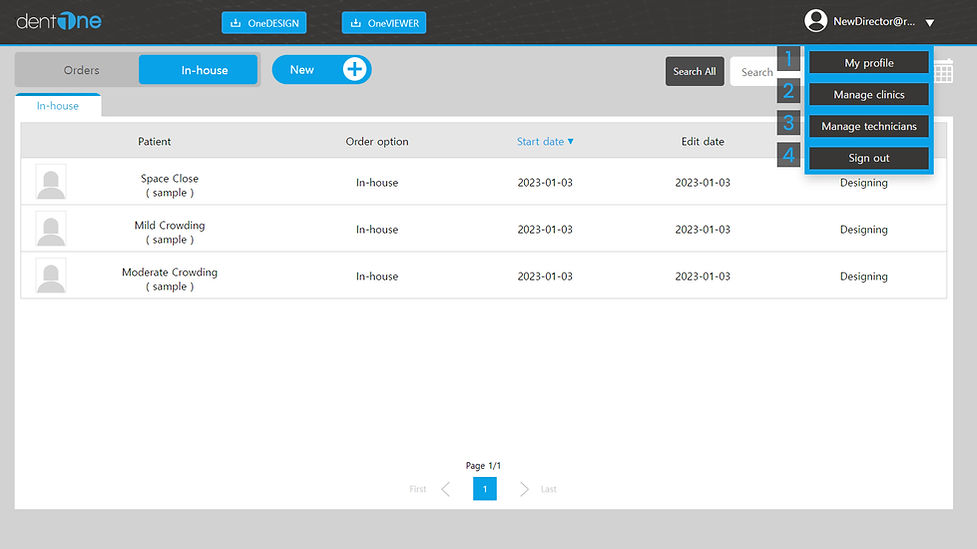
1. My profile : Edit the Profile information for the Director.

-
Change button: Password can be changed.
* Password format: Password must be at least 8 digits and must consist of numbers + English + special characters.
[ Change password Popup ]

2. WebSite input field: Lab's WebSite can be registered, and you can check if it is a normal URL with the Test button.
3. Introduction Input Box: Basic phrases for Lab introduction are written and can be modified.
2. Manage Clinics : Check the registered clinic.

-
Clinic Card: Basic information of registered Clinic and the Clinic Detail View button are displayed.
-
Clinic Details Button: Displays details of registered Clinics.
[ Clinician Profile Popup ]

3. Manage technicians: Manage technicians.

-
Incoming Technician Card: The Basic Information, Detail View button, and Accept button of Technician who requested registration with Lab are displayed.
-
View Technician Details Button: Shows the details of Technician who requested registration with Lab.
[ Technician Profile Popup ]

3. Accept Button : Accept Technician who requested registration with Lab.
4. Registered Technician Card: A Technician Card registered with the Lab.
5. View Technician Details Button: Displays details of Technician registered in the Lab.
[ Technician Profile Popup ]

6. Edit the Technician information registered with the Lab.
[ Technician profile Popup ]

-
You can withdraw a registered technician.
4. Sign out : Log out button.
Make the future of digital orthodontic appliances for everyone
bottom of page